
Table of Contents
- Why Cleaning Your Microwave Properly Matters
- Benefits of Removing Microwave Parts for Cleaning
- 4 Microwave Parts You Can Easily Remove
- Step-by-Step Cleaning Process
- Common Mistakes to Avoid
- One Table: Microwave Parts Cleaning Overview
- FAQs
Why Cleaning Your Microwave Properly Matters
Microwaves are one of the most frequently used appliances in any kitchen, yet they are often the most neglected when it comes to deep cleaning. Food splatters, grease buildup, and lingering odors can quickly turn your microwave into a breeding ground for bacteria. Simply wiping the interior is not enough to ensure proper hygiene.
Most people don’t realize that several microwave components are designed to be removable. These parts can trap food particles and grease over time, which affects not only cleanliness but also the efficiency of the appliance. When left uncleaned, buildup can even cause unpleasant smells during heating.
Deep cleaning your microwave by removing these hidden parts helps extend its lifespan, improves performance, and ensures your food remains safe and fresh.
Benefits of Removing Microwave Parts for Cleaning
Removing microwave parts might sound complicated, but it is actually quite simple and highly beneficial. Many modern microwaves are designed with user-friendly removable components that make cleaning easier than ever.
First, it allows you to clean hard-to-reach areas where food debris accumulates. Second, it prevents stubborn stains and odors from becoming permanent. Third, it improves the microwave’s efficiency by ensuring even heating without obstruction.
Additionally, removable parts can often be washed separately with soap and water, or even placed in a dishwasher, making the process more convenient and effective.
4 Microwave Parts You Can Easily Remove
1. Glass Turntable
The glass turntable is the most obvious removable part, yet many people still overlook cleaning it thoroughly. This rotating plate collects spills, crumbs, and grease from food.
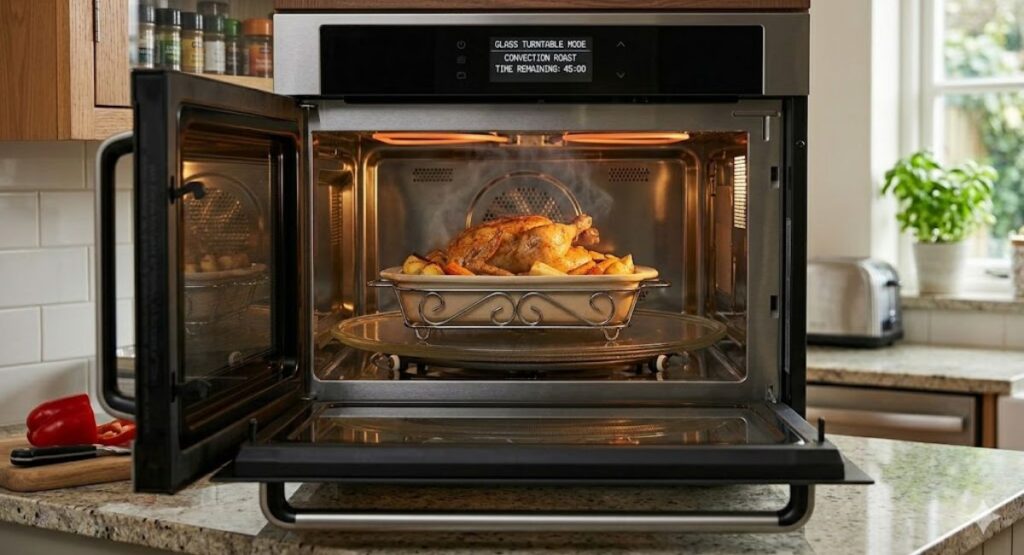
You can easily lift it out of the microwave and wash it with warm soapy water. For stubborn stains, soaking it for a few minutes works wonders. Make sure it is completely dry before placing it back.
2. Turntable Support Ring (Roller Ring)
Beneath the glass plate lies the turntable support ring, often fitted with small wheels. This part helps the plate rotate smoothly.
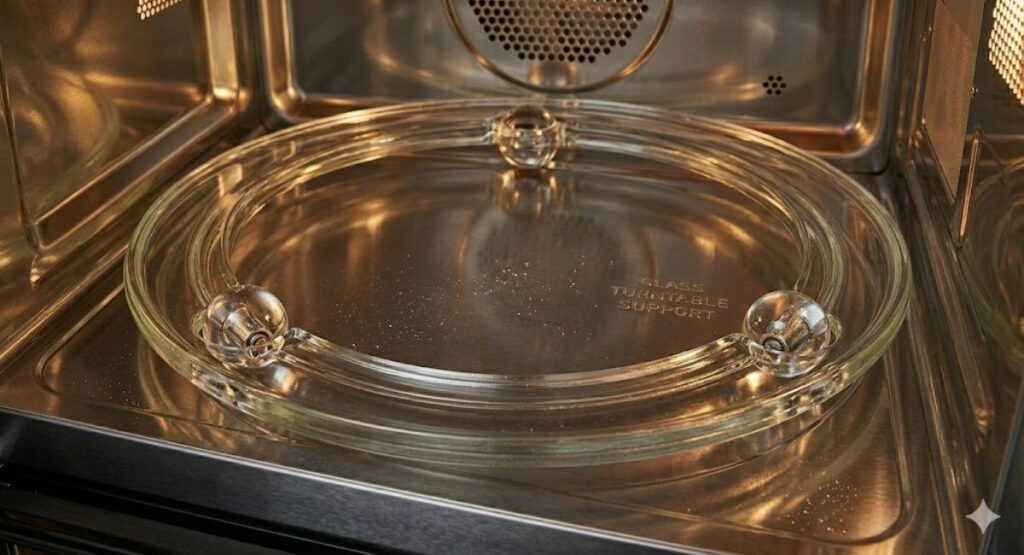
Food particles and grease often get trapped around the wheels, making it a hidden source of dirt. Simply remove it, rinse it under warm water, and scrub gently using a brush to clean between the wheels.
3. Microwave Grease Filter
If you have an over-the-range microwave, it likely contains a grease filter located underneath. This filter traps grease from cooking vapors.
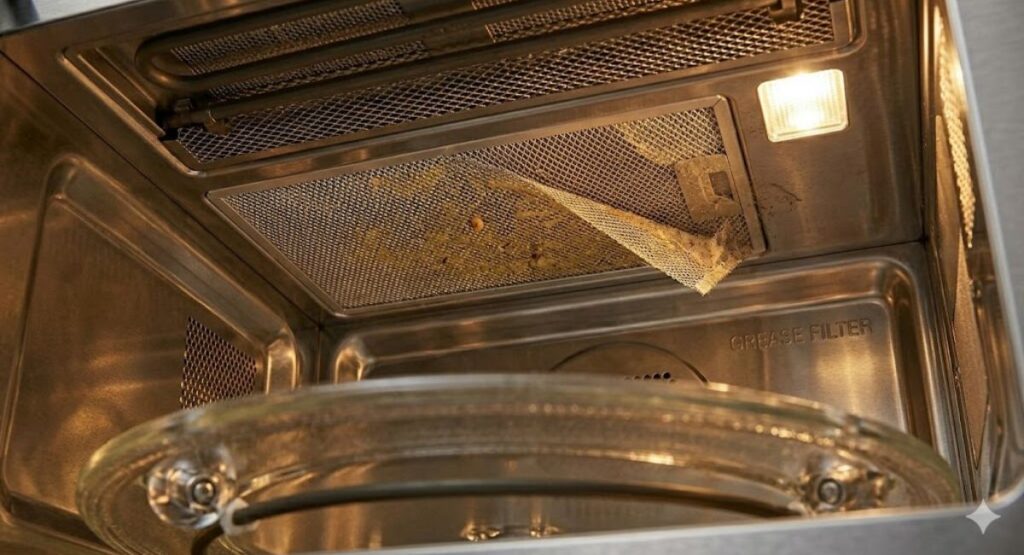
Over time, it becomes clogged and less effective. Most grease filters can be slid or popped out easily. Clean them using warm water mixed with dish soap or a degreaser. In some cases, they are dishwasher-safe.
4. Charcoal Filter (Odor Filter)
The charcoal filter is responsible for absorbing odors, especially in recirculating microwaves. Unlike the grease filter, this one is usually not washable.
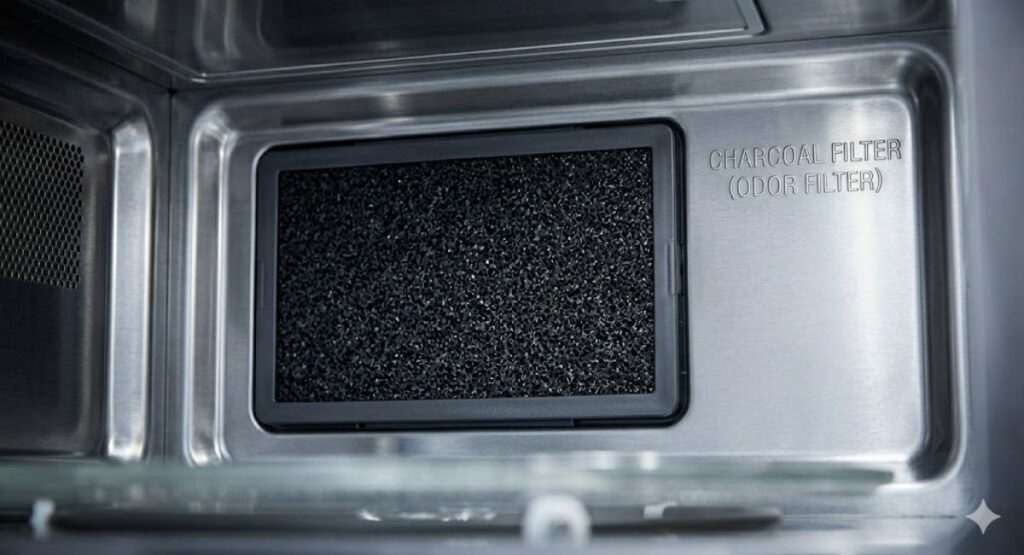
However, it is removable and should be replaced periodically. Removing it allows you to check its condition and ensure your microwave remains odor-free.
Step-by-Step Cleaning Process
Cleaning your microwave properly doesn’t take much time if you follow a systematic approach.
Start by unplugging the microwave for safety. Remove the glass turntable and the support ring. Wash both with warm, soapy water and let them dry.
Next, if your microwave has a grease filter, remove it and soak it in a mixture of warm water and dish soap. Scrub gently to remove grease buildup.
Wipe the interior walls of the microwave using a damp cloth or a mixture of vinegar and water. Pay attention to corners and edges where residue tends to accumulate.
Finally, check the charcoal filter and replace it if necessary. Reassemble all parts once they are completely dry.
Common Mistakes to Avoid
One common mistake is assuming that wiping the interior is enough. This ignores hidden dirt trapped in removable parts.
Another mistake is using harsh chemicals or abrasive scrubbers that can damage microwave components. Always opt for mild cleaning solutions.
Some people also forget to dry parts completely before placing them back, which can lead to unpleasant odors or even damage.
Lastly, neglecting the grease filter for long periods can reduce the efficiency of your microwave ventilation system.
One Table: Microwave Parts Cleaning Overview
| Microwave Part | Removable | Cleaning Method | Frequency |
|---|---|---|---|
| Glass Turntable | Yes | Wash with soapy water | Weekly |
| Support Ring | Yes | Rinse and scrub gently | Weekly |
| Grease Filter | Yes | Soak and degrease | Monthly |
| Charcoal Filter | Yes | Replace (not washable) | Every 3–6 months |
FAQs
Q: Can I put the microwave glass turntable in the dishwasher?
A: Yes, most glass turntables are dishwasher-safe, but always check your manufacturer’s instructions.
Q: How often should I clean my microwave?
A: Light cleaning should be done weekly, while deep cleaning with removable parts should be done at least once a month.
Q: What happens if I don’t clean the grease filter?
A: A clogged grease filter can reduce ventilation efficiency and cause grease buildup inside your kitchen.
Q: Is the charcoal filter reusable?
A: No, charcoal filters are not washable and should be replaced periodically.
Q: Can I use vinegar to clean my microwave?
A: Yes, vinegar mixed with water is a safe and effective natural cleaner for removing stains and odors.
This simple habit of removing and cleaning these four microwave parts can make a huge difference. Not only will your appliance look cleaner, but it will also work more efficiently and last longer something most people overlook entirely.