
Understanding Exterior Door Installation
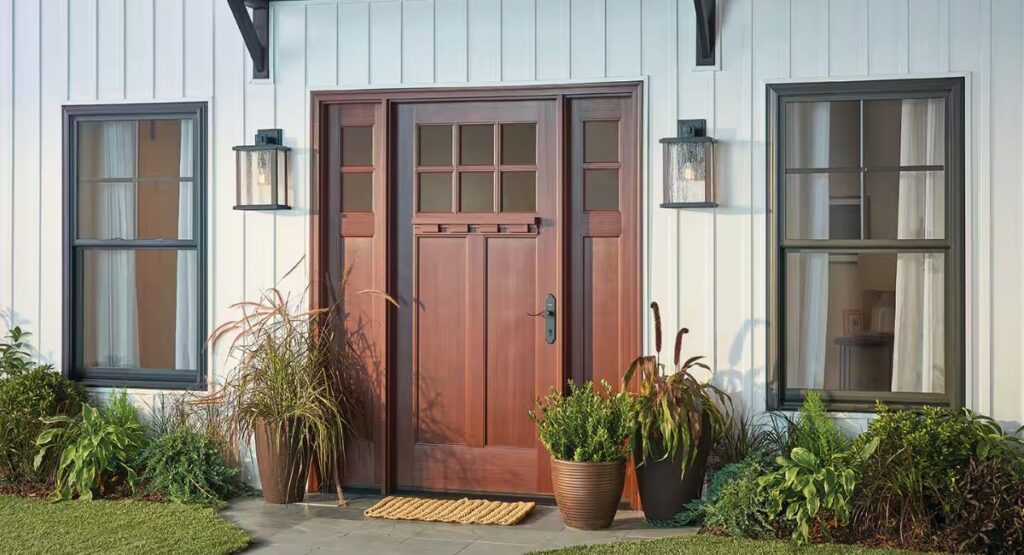
Replacing or installing an exterior door is one of the best upgrades you can make for your home. A properly installed exterior door improves security, reduces air leaks, blocks outside noise, and instantly upgrades curb appeal. The good news is: you don’t need to be a professional contractor to do it if you follow the right steps and avoid common mistakes.
In this guide, I’ll walk you through everything you need to know about exterior door installation, including tools, measurements, removal, framing, sealing, and finishing. Whether you’re installing a brand-new door in a new opening or replacing an old one, this article will help you get it done the right way.
Why Exterior Door Installation Matters
An exterior door is not just a design feature. It’s a major part of your home’s protection and insulation. If a door is installed incorrectly, you may face:
- Drafts and cold air leaks
- Water entering during rain
- Door sticking or not closing properly
- Weak security due to poor alignment
- Increased energy bills
- Early door damage due to moisture exposure
That’s why installation is just as important as the door you buy.
Types of Exterior Doors You Can Install
Before installation, it’s important to understand what type of door you’re working with. The steps are mostly similar, but materials and handling can differ.
Common exterior door types include:
- Steel exterior doors
- Fiberglass exterior doors
- Solid wood exterior doors
- Composite doors
- Double doors
- French doors
- Doors with sidelights
- Doors with transoms
Most homeowners choose fiberglass or steel doors because they are durable, energy-efficient, and require less maintenance than wood.
Prehung Door vs Slab Door: Which One Is Better?
Exterior doors come in two main forms:
A prehung door includes:
- Door slab
- Door frame (jamb)
- Hinges already attached
- Weatherstripping often included
A slab door includes:
- Only the door itself
- No frame, no hinges, no threshold
For most DIY exterior door installations, a prehung door is the best choice because it is easier to align and seal.
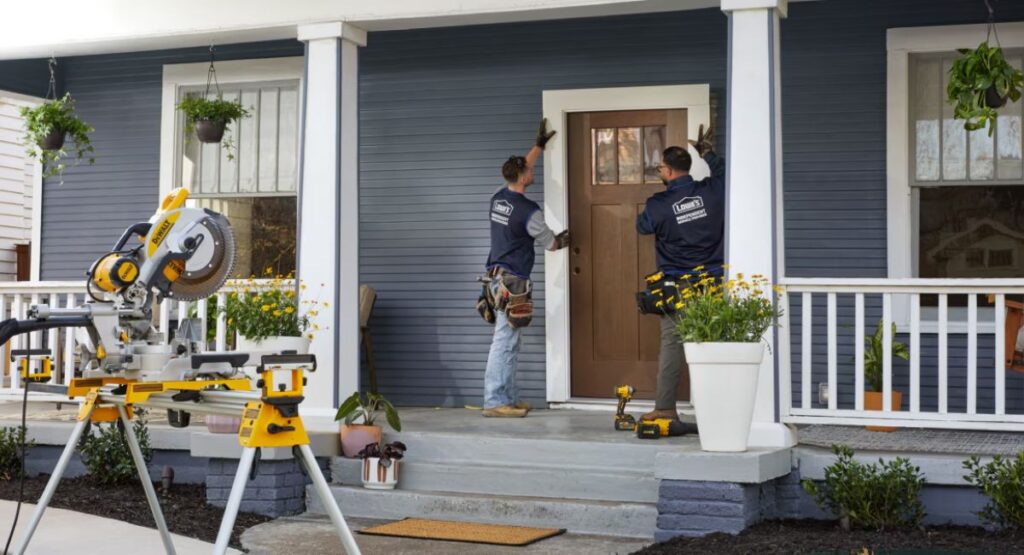
Tools and Materials You Need for Exterior Door Installation
You don’t need a huge workshop, but you do need the right tools for accuracy and safety.
Here’s what you should have ready:
- Tape measure
- Level (at least 4 feet)
- Shims (wood or composite)
- Drill and drill bits
- Screwdriver
- Hammer
- Pry bar
- Utility knife
- Caulk gun
- Exterior-grade caulk
- Expanding foam insulation (door and window type)
- Screws (long and corrosion-resistant)
- Safety gloves and glasses
- Weatherproof flashing tape (optional but recommended)
Having everything ready before you start will save time and prevent mistakes.
Exterior Door Installation Cost and Time
The cost depends on the type of door, location, and whether you hire a professional.
Below is a quick cost guide to help you understand what to expect:
| Installation Type | DIY Cost Estimate | Professional Cost Estimate |
|---|---|---|
| Replace prehung exterior door | $250–$900 | $700–$2,000 |
| Install exterior door in new opening | $400–$1,200 | $1,500–$4,000 |
| Install door with sidelights | $700–$2,500 | $2,500–$6,000 |
| Install double exterior doors | $900–$3,500 | $3,000–$7,000 |
DIY saves money, but only if you install it correctly. A poorly installed door can lead to expensive repairs later.
Step 1: Measure the Door Opening Correctly
This is the most important part of exterior door installation. If your measurements are off, the door will not fit properly.
Measure these three things:
- Width of the rough opening
- Height of the rough opening
- Depth of the wall (usually 4 9/16 or 6 9/16)
Rough opening should usually be:
- About 2 inches wider than the door
- About 2 inches taller than the door
For example, a standard 36” door typically needs a rough opening around 38” wide.
Always measure in at least three places:
- Top
- Middle
- Bottom
Use the smallest measurement for accuracy.
Step 2: Remove the Old Exterior Door Carefully
If you are replacing an old door, removal needs to be clean to avoid damaging the framing.
Steps to remove an old door:
- Remove the door slab from hinges
- Remove trim from both sides using a pry bar
- Cut caulk lines with a utility knife
- Remove screws or nails holding the jamb
- Pull out the old frame carefully
If the old door has a threshold, remove it too and clean the surface underneath.
Take your time here. If you damage the studs or rough opening, you’ll have extra repair work.
Step 3: Inspect the Rough Opening for Damage
Exterior doors often fail due to water damage. Before installing the new door, check for:
- Rotting wood
- Mold or moisture stains
- Soft spots near the floor
- Termite damage
- Uneven sill or framing
If the rough opening is damaged, fix it before installing the door.
A new door will not solve structural issues, and it will not last long if the frame is weak.
Step 4: Check the Floor and Sill Level
A level threshold is key for a door that closes smoothly.
Place a level across the bottom of the opening and check:
- Is it level side to side?
- Is it solid and stable?
If the sill is not level, use shims under the threshold area until it becomes level.
Even a small slope can cause:
- Gaps
- Door swing issues
- Water leaks
- Poor weather sealing
Step 5: Apply Flashing and Waterproofing
Exterior door installation must include proper sealing to prevent water leaks.
Here’s the recommended waterproofing approach:
- Apply flashing tape along the bottom of the opening
- Extend it slightly up the sides
- Add a bead of exterior caulk under the threshold area
You can also use a sill pan kit, which is highly recommended in rainy or humid climates.
This step protects your home from water damage over the long term.
Step 6: Dry Fit the Prehung Door Before Screwing
Before permanently installing, place the prehung door into the opening without screws.
Check:
- Is there equal spacing on both sides?
- Does it sit flush against the exterior wall?
- Does it look centered and straight?
If something feels off now, fix it before you start fastening.
Step 7: Shim and Level the Door Frame
Shimming is what makes the door perfectly aligned.
Start by shimming the hinge side:
- Place shims behind the top hinge
- Place shims behind the middle hinge
- Place shims behind the bottom hinge
Use a level to ensure the hinge-side jamb is plumb (straight up and down).
Then move to the latch side and shim it as needed to keep spacing consistent.
The gap around the door should be even on all sides.
Step 8: Secure the Door Frame with Screws
Once the door is plumb and level, it’s time to secure it.
Use long screws (usually 3 inches) to anchor the jamb into the studs.
Best practice:
- Replace one hinge screw per hinge with a long screw
- Screw through the shims so the frame doesn’t bend
- Add screws on the latch side and top jamb
Avoid overtightening screws, as it can warp the frame.
Step 9: Test the Door Swing and Closing
Before insulating or sealing permanently, test everything.
Check:
- Door opens smoothly
- Door closes without rubbing
- Latch aligns correctly
- Deadbolt lines up
- Door seals evenly against weatherstrip
If the door sticks or gaps are uneven, adjust shims and screws now.
This is the best time to fix issues because trim and foam are not installed yet.
Step 10: Install the Threshold Correctly
Some prehung doors include an adjustable threshold.
If yours does, you can raise or lower it so it seals perfectly.
A good threshold setup means:
- No light visible under the door
- No air coming through
- Door closes without dragging
If your door drags, don’t force it. Adjust the threshold instead.
Step 11: Insulate Around the Door Frame
This step improves energy efficiency and prevents drafts.
Use low-expansion foam designed for doors and windows.
Do not use high-expansion foam because it can:
- Warp the jamb
- Push the door out of alignment
- Cause sticking issues
Apply foam lightly around:
- Both side jambs
- The top jamb
Leave the foam to expand and cure fully before trimming.
Step 12: Reinstall Interior and Exterior Trim
After foam cures:
- Trim excess foam with a utility knife
- Install casing trim inside and outside
- Caulk trim edges with exterior-grade caulk
- Fill nail holes and paint if needed
Exterior trim must be sealed well to prevent water entry.
Step 13: Seal the Outside for Weather Protection
Exterior door installation is not complete until sealing is done.
Do the following:
- Caulk around exterior trim
- Seal gaps where jamb meets siding
- Ensure no open cracks remain
- Add a door sweep if needed
Proper sealing protects your home from:
- Wind
- Rain
- Dust
- Bugs
- Temperature changes
Common Exterior Door Installation Mistakes to Avoid
Even good DIY installers make mistakes. Here are the most common ones and how to avoid them.
Not checking the rough opening for rot
If wood is damaged, replace it before installing.
Skipping waterproofing
This leads to leaks and future framing damage.
Using the wrong foam
High-expansion foam can ruin alignment.
Not shimming properly
Without shims, the door will twist over time.
Over-tightening screws
This bends the frame and causes sticking.
Ignoring threshold adjustment
Many people don’t realize thresholds are adjustable.
How to Know Your Exterior Door Is Installed Correctly
A correctly installed exterior door will have:
- Even gaps around the door
- Smooth opening and closing
- Proper latch and lock alignment
- Tight weatherstripping contact
- No drafts or daylight visible
- No water leaks during rain
If your door meets these points, you did the job right.
Exterior Door Installation Tips for a Professional Finish
If you want your DIY door installation to look like a contractor did it, follow these tips:
- Use composite shims instead of cheap wood shims
- Always replace hinge screws with long screws for security
- Paint or seal any exposed wood edges
- Add a drip cap above the door if needed
- Use high-quality exterior caulk
- Don’t rush the leveling process
Small details make a big difference.
Final Thoughts
Exterior door installation is one of the most valuable home improvement projects you can do. It increases energy efficiency, improves security, boosts curb appeal, and adds long-term comfort to your home. The key is to take your time, measure correctly, shim carefully, and seal everything properly.
Whether you’re installing a new prehung door or replacing an old one, following the steps in this guide will help you achieve a strong, weather-tight, and professional-looking result.